For live work with electronics, flight cases are your friend
OK, so we looked at what sort of gear you could use last time, but a recent Facebook post about module failures got me thinking about using this stuff practically live.
I’ve seen enough function bands who use electronics setting up to know how not to do it. Theres nothing worse than watching someone at a gig or function build the rack from scratch, then take each pad out, put it on the rack, get the module out and put it on the rack and then wire the whole thing up. Not only does it take ages but its not convenient, looks rubbish, plus you just know the drummer hasn’t got a backup if anything goes wrong.
If you’ve ever seen a touring band setting up and breaking down, you’ll probably have been impressed with the speed which stuff gets done. Everything gets put into a flightcase, sometimes hardly dismantled, and the whole rig gets wheeled in or out of the trucks in no time at all.
 OK, so 99% of us don’t have massive flightcases, techs, or trucks to move the gear around in, but we can borrow a few ideas from the big boys. Firstly, why use a rack? Its not simpler, or easier to move round, You can use stands to set up the whole kit, just like an acoustic kit, and its much easier to pack away quickly without a large case. If you have the space, get an extra long stands case, just collapse the legs of each stand, remove the booms (all labelled up of course) and you can get the stands away in a couple (literally) of minutes.
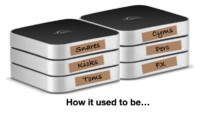
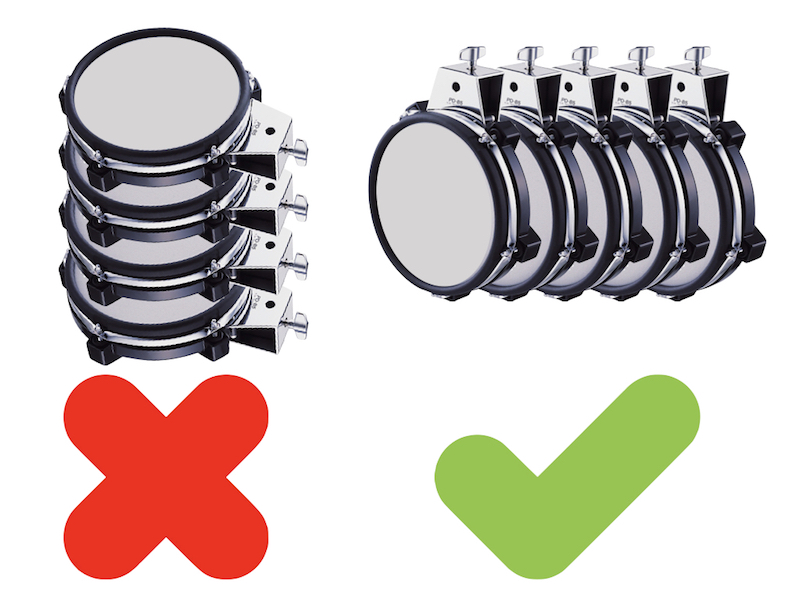
 As far as the drum pads are concerned, you need to store them on edge as the weight of a pile of pads can damage them. However, cymbal pads need to be stored flat as the edge switches get damaged if stored on the edge. If you do store them on their edges then you need to make sure that the playing area is pointing upwards so theres no pressure on them.
However, you might use a mesh headed acoustic kit with triggers, to keep the look as real as possible. If thats the case, then leave any external triggers on them and put them in the cases whole. I did a tour years ago where I left the ddrum triggers on the drums in the cases but I cut some wooden discs out with cutaways for the triggers, which rested on the top heads. These prevented any pressure applied to the cases being transferred to the triggers. I did the whole tour (a few weeks, cant remember) with no trigger failures and only minimal tweaks to the heads.
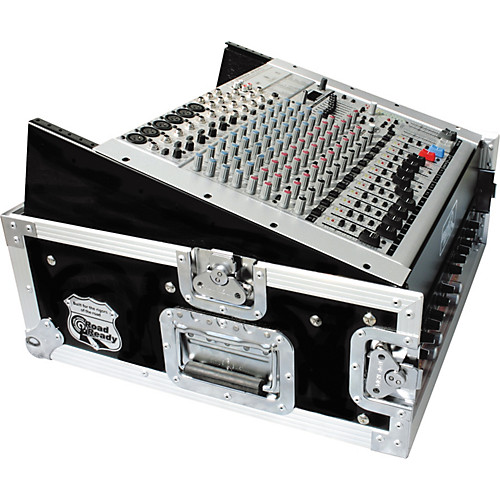
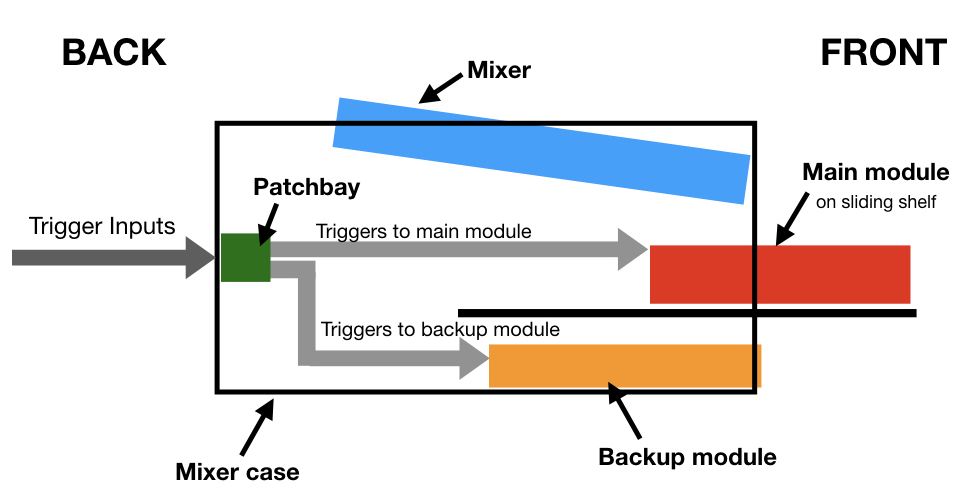
But the real time saver comes with the module and all the associated electronics. Lets assume you have your module, and maybe a mini mixer so you can mix your own in ear monitor sound with the foldback (rest of band) and anything else you might need (such as cymbal overheads if you are using real cymbals). Rather than plug everything together and resting it all on a case or box, how about everything is already to go in a small 19” flightcase – you take off the front, pull out the module, take off the back, unravel the cable snake and plug them into the pads, take the top off to reveal the mixer, plug in the mains and the foldback and away you go? Less than five minutes.

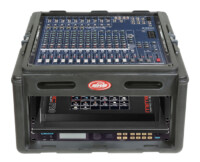
Take a mixer rack…
This might sound expensive but it really need not be. Firstly you need a DJ mixer flight case with a removable top, front and back (theres a suitable one on my local Gumtree for £25 – not expensive). You install the mixer under the top lid so its ready to go as soon as you remove it. You put your main module on a sliding rack shelf (£30ish off eBay) just under the mixer so you just pull it out (its already all wired in) and turn it on. At the bottom of the case you bolt in a cheap rack mount module like the Alesis D4, DM5, Yamaha TMX or RM50 (all available for around £50 off eBay if you are lucky). This is only for backup, so you only need to set one kit up (just to get you to the end of the gig) and make it sound as good as possible.
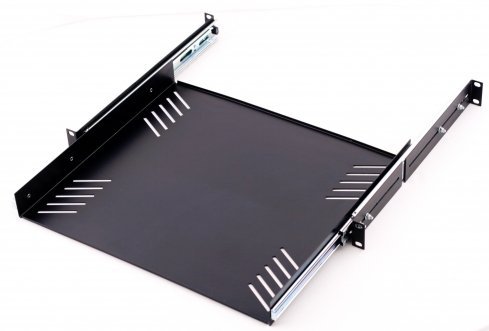
…add a sliding rack shelf for your module…
As for how you secure your module onto the sliding rack shelf, that is easy too. You have two available methods. If your module is light in weight, some industrial Velcro will do the trick. If your module is heavier, expensive or rare, then drill holes in the rack shelf (if it doesn’t have them already) and use cable ties to secure the module firmly to the shelf. You can easily join cable ties together to make longer ones, so loop them all round the module (making sure they don’t get in the way of any button pushing that it required) and the job is good. If the flightcase is tilted in transport (and it will be) your module wont get damaged.
I always cable tie all the cabling together into a snake, leaving just enough to get to the correct pad. Rather than unplug this from the patchbay (more of this later) I just coil it up and leave it in the back ‘door’ of the rack. When I need to set up, I just open the rear door, uncoil the ‘snake’ and plug it into the pads.
Now the subject of ‘backup module’ is a little touchy, as to be honest, you shouldn’t really need one (after all, who knows a keyboard player who carts around an entire second rig ‘just in case’? However it is better to be prepared ‘just in case’ too). But if you have one, and never use it, that is better than not having one, and really, really needing it, two songs into the first set at a wedding.
…add a patchy to trigger main and backup modules at the same time…
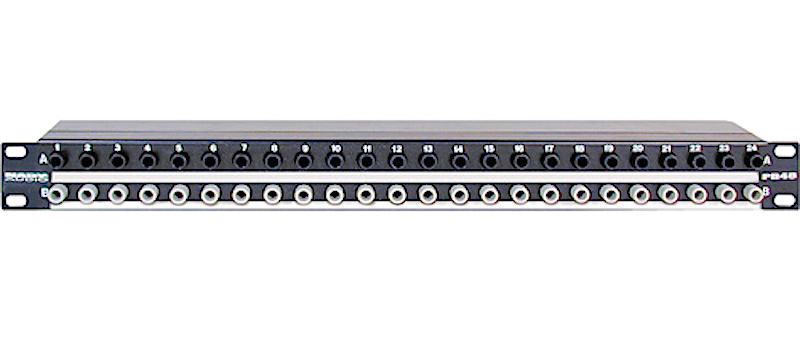
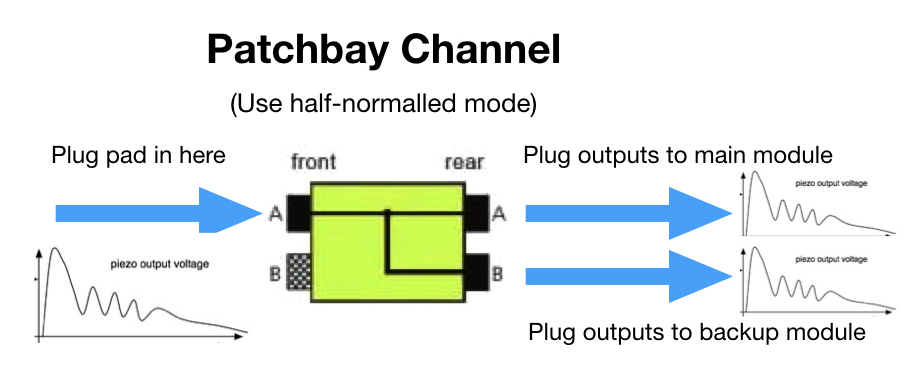
The bit which confuses most people is how to wire up the two modules. This actually couldn’t be easier and it uses a patchbay (£30 upwards from eBay) like you’d find in a studio. Patchbays have a ‘half normalled mode’ that allows you to split one input to two outputs. If you connect one set of outputs to your main module and the other set to the second ‘backup’ module, you will be able to trigger both at the same time from one pad input. Then, if your main module dies, mid gig, you just raise the volume of the second module, turn down the main module, and you carry on. Simple and it takes under five seconds to change.
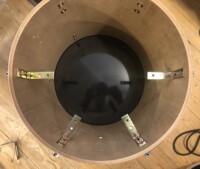
 You can simplify stuff even further if you want. I was asked to make a kit which ‘looked real’ but was easy to move around for a drummer. I got an old bass drum, removed the batter head and made custom foam ‘shelves’ so the rest of the pads could be stored inside it for travel. The drummer used a Roland KT-10 pedal so didn’t need a ‘proper’ bass drum. The ddrum tom and snare pads all fitted inside and as the drummer used real cymbals with the set, it was nice and compact. It wasn’t light, but it all fitted into a wheeled Hardcase bass drum case so could be trundled from car to venue.
So thats it. Apply a little thought and make your life easier. It doesn’t have to be hard.
Simon Edgoose
December 2018