Is this an acoustic kit? Or is it a triggered kit with mesh heads and real cymbals? Can you tell? Your audience definitely cant.
So, do you gig your electronic kit? Or do you use it just for practice? Is there a reason you don’t use an electronic kit live? Are there many reason?
OK, so I think we’ve all been there. We’ve have a chance to use our electronic kit in a live situation, a function say…but…well… it just doesn’t feel the right thing to do, does it?
But with venues getting more worried about being sued by their neighbours, many are resorting to noise limiters to enforce sound levels. What can we drummers do to get around this? Well, we can use our electronic kits, but we’ve already decided that electronic kits just..aren’t right…
Let look at the issues of using electronic kits live;
-
It just doesn’t look right – Ok, we we’ll come back to this in a bit…
-
I need decent amplification– absolutely. Don’t try and put your kit through a practice amp and wonder why you cant hear it. My rule of thumb is you need a minimum of around 1k or 1000 watts of amplification and full range speakers to make an electronic kit move as much air as an acoustic kit, and thats just the beginning – if you want more volume, you’ll need more air movement. Or of course, just plug it into the band or house PA
-
It doesn’t sound right– I doubt anyone in the audience at a typical wedding or company function will know, or actually give a monkeys, if you’re hitting a 1936 Black Beauty or a 2017 2box kit. As long as you are happy playing it, and it sounds good, and the band sounds good, then all is good, and you’re more likely to be rebooked.
-
It doesn’t have the dynamic range. Well, if it doesn’t, then you haven’t set it up correctly then have you? Quick answer – go back and look at all the other articles in this series and learn how to set it up for you.
-
It doesn’t look right.Ok, yes I get it. Hang on, we’ll get to this…
-
It doesn’t look right.Yes, yes…ok!
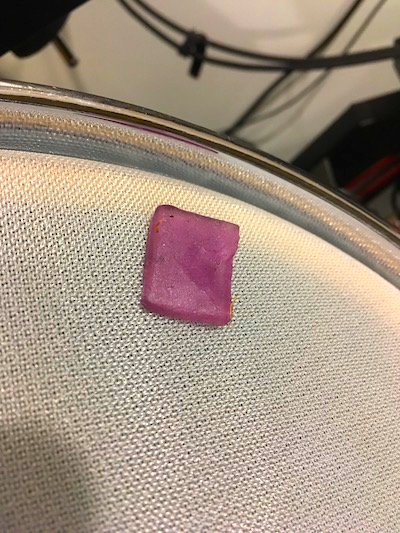
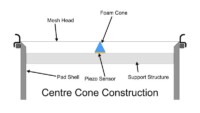
Why is there some Moongel on a mesh head? Wait until later
So lets look at this visual issue. Lets face it, electronic drums don’t look great on stage. If you turn up to a gig and theres an electronic kit on stage, your heart does sink slightly, doesn’t it? But it doesn’t have to.
You’ll probably have noticed that many electronic drum manufacturers are making full sized bass drum pads/triggers now. This is all in attempt to make drummers gig their kits more. They also come with a sizeable price tag.
But all this doesn’t have to be expensive. If you want to go down this route, try this;
-
Buy a cheap kit off eBay or Gumtree (remember – NO ONE in the audience could give a monkeys about what make the kit is as long as the band sounds great). A student of mine bought a £75 kit off eBay and did the following and gigs with it.
-
Make the kit look nice, or at least so it appeals to you visually. Set it up how you normally set up your acoustic kit. Remove the badges if they worry you.
-
Buy some mesh heads to fit the batter heads of the kit – don’t buy expensive ones as they have zero affect on the sound, don’t trigger any better, and don’t necessarily last any longer. Remo make Silentstrokes which are single ply. ZED make one, two and three ply heads which are very reasonably priced. If you are worried about the logos, remove them with nail varnish remover.
-
Buy some triggers. Buy a reputable make, but don’t just buy the most expensive ones – they all work in exactly the same way, and I’ll show you a hack later which will make any of them work. Look at ddrum, Yamaha, Roland, 2box (these ones can be found at great prices at the moment, and work great).
-
Put the mesh heads on the kit. Tighten them up higher than you would do normally. Mount the triggers on the far side of the drums. Keep the normal heads on the non playing side to make the kit still look like an acoustic one.
-
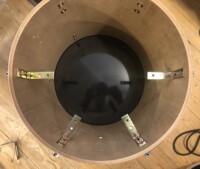
If the drums feel too bouncy, buy some 2” thick upholstery foam. Cut it to size so that it can tightly wrap around the inside of the shell, all the way around. Cut it 1cm deeper than the drum is deep so the heads hold it in place. Put the foam in the drums. This makes the feel much more positive and less bouncy.
-
On the kick, put pillows inside it, up to a point just below where the beater hits. Leave a normal, full head on the front to make the kit look like an acoustic one. Put the trigger at the top of the head.
-
Don’t use a felt beater on the kick! Use a plastic one or you’ll go through the head in a matter of hours.
-
Put the whole kit together. Plug it into your module. Plug in your cymbal pads.
-
Turn it on and play.
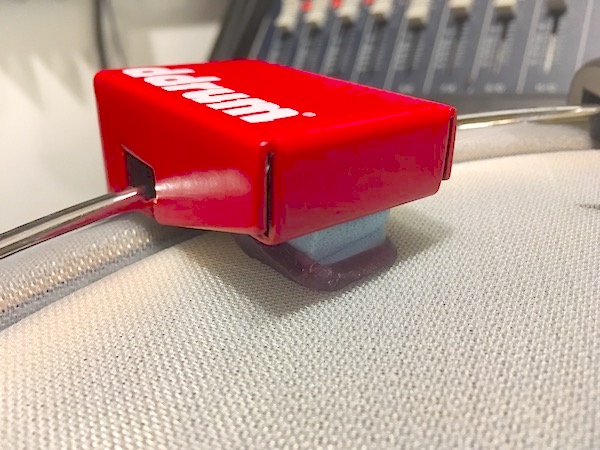
Squash the Moongel onto the head with the trigger
If you have problems with the triggering, I’ll let you in on a little trick/hack that works great, only requires a little tweaking, and allows you to not have to totally reset all the trigger setting on your module.
I don’t honestly know if I came up with this, but I used it on a tour about 15 years ago and I didn’t change a single thing from start to finish. I put the drums in the cases with the triggers still attached and everything was great. I’d used it before then, but that tour was proof for me that it was road worthy.
Anyhow, rather than tweaking the module to suit the heads and the triggers, how about hacking the triggers to give the same output as rubber pads and save all the hassle? To do this, just buy some Moongel or similar silicone damping gel, cut each piece in half and squash it between the mesh head and the trigger sensor. The silicon gel acts like a mechanical noise gate – it absorbs smaller vibrations and only lets through the bigger ones (the actual stick hits).
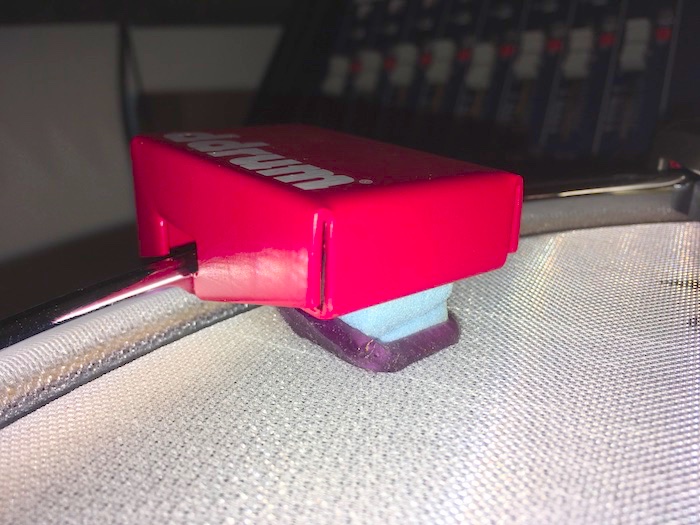
A brighter shot to show what it should look like
The only tweak you might have to do in the module is turn up the Gain so that the module hits 100% only on the strongest hits. This is because the gel absorbs some of the power of the stick hits, so makes it slightly quieter. But turning up the gain is a minimal price to pay for the convenience. Theoretically, you should be able to plug your normal pads back into the module without having to change anything, apart from possibly just turning down the gain.
So, follow these simple instructions and you should end up with a kit which you can play almost silently, can gig with in noise sensitive venues, which 99% of the audience wont even realise is an electronic kit, and without breaking the bank.
Hopefully, that should be a no-brainer.
PS As I guessed someone would ask, after I wrote this, I grabbed a few items from my collection of gear just to prove how easy this is, and how well the hack mentioned above works. I grabbed (completely at random) an Alesis DM10 module, a ddrum Pro trigger and a ZED three ply mesh head. In under three minutes, using the hack, I had pretty much perfect triggering from a module that is notoriously difficult to set up with some triggers. Easy.
PPS I’ve just remembered that I used this method in Austria last week on a low end kit that was never designed to work with triggers and mesh heads and only has basic triggering parameters. Needless to say, it worked perfectly.
Simon Edgoose
November 2018
simon@edruminfo.com